Trimming cannabis is where your harvest starts to look like something you’d be proud to show off. After all the hard work of growing and drying, this final step brings out the true beauty and quality of your buds. It’s not just about looks,proper trimming improves flavor, potency, and how smoothly your buds burn. Whether you’re new to it or have a few harvests under your belt, learning to trim the right way can make a big difference. So grab your scissors, find a comfy seat, and let’s walk through the process step by step.
Why Trimming Matters for Bud Quality
Trimming isn’t just for looks,it directly impacts your buds’ flavor, potency, and smoothness when smoked. Leaving excess leaves can trap moisture, leading to mold and terpene loss. A clean trim helps buds dry and cure evenly, preserves aroma, and ensures a better burn. For top-shelf cannabis, proper trimming is essential.
Step 1: Choosing the Right Tools & Keeping Them Sharp
Having the right tools can improve your trimming efficiency and results dramatically.
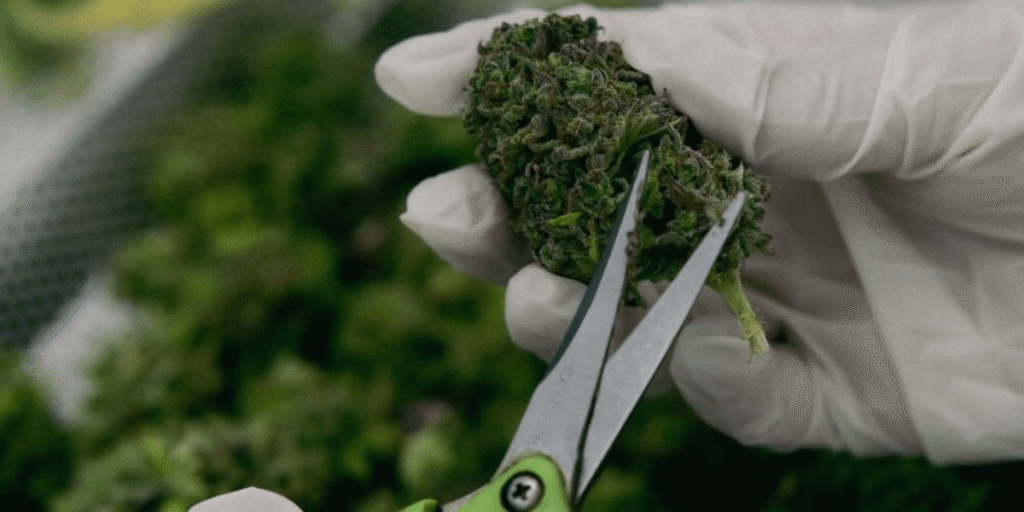
- Scissors or pruning shears: Sharp, fine-point scissors are ideal. Avoid dull blades that crush instead of cut.
- Gloves: Latex or nitrile gloves protect your hands and keep sticky resin off your skin.
- Trimming tray or mat: Keeps your workspace tidy and makes cleanup easier.
- Maintenance: Regularly clean your scissors with isopropyl alcohol to remove resin buildup and keep blades sharp.
Properly maintained tools make trimming faster and less fatiguing.
Step 2: When’s the Best Time to Trim Your Buds?
Knowing the right moment to trim affects quality:
- Trichome inspection: Use a magnifying glass to check trichomes. When most are milky with some amber, buds are mature.
- Pistil color: When 70–90% of pistils have darkened and curled in, it’s harvest time.
- Bud density: Mature buds feel dense and firm.
- Smell: A strong, pungent aroma is a good sign of maturity.
Wet trimming: Trim immediately after harvest, while buds are fresh and leaves are easier to cut.
Dry trimming: Dry trimming: Hang buds to dry for 7–10 days until stems snap, then trim. To learn more about the best flushing timing.
Step 3: Wet vs. Dry: Which Trimming Method Should You Use?
| Feature | Wet Trimming | Dry Trimming |
|---|---|---|
| Timing | Immediately after harvest | After buds have dried for several days |
| Ease of trimming | Easier to trim fresh leaves | Leaves become brittle and harder to trim |
| Curing time | Slightly longer curing needed | Faster curing due to pre-dried buds |
| Appearance | Buds often look neater immediately | Buds may look tighter but less manicured |
| Mold risk | Higher mold risk if drying conditions poor | Lower mold risk |
Choose based on your drying environment, personal preference, and final product goals.
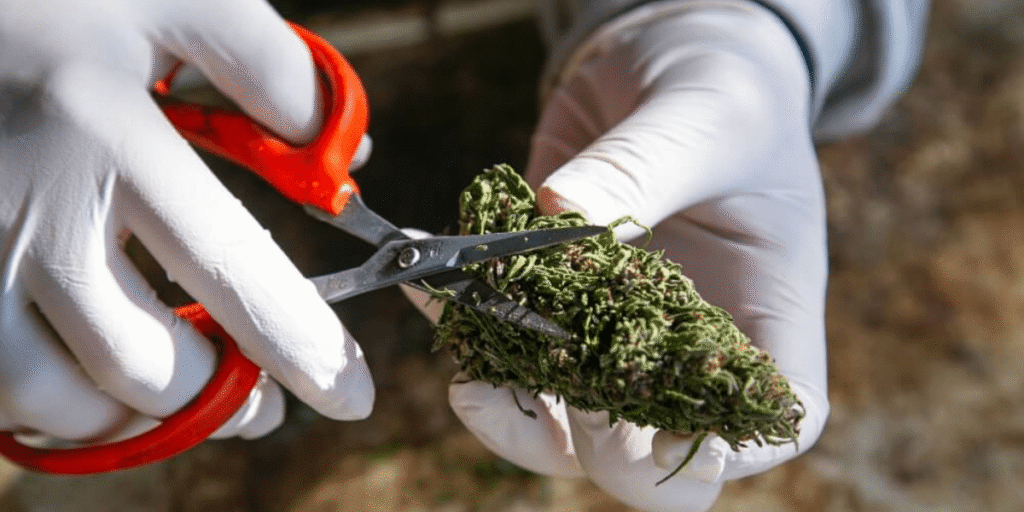
Step 4: Your Step-by-Step Guide to Perfectly Manicured Buds
- Work in manageable sections, starting with large fan leaves.
- Use sharp scissors to carefully snip sugar leaves close to the bud without damaging trichomes.
- Remove excess leaves while leaving the resinous sugar leaves intact.
- Handle buds gently to preserve trichomes and avoid bruising.
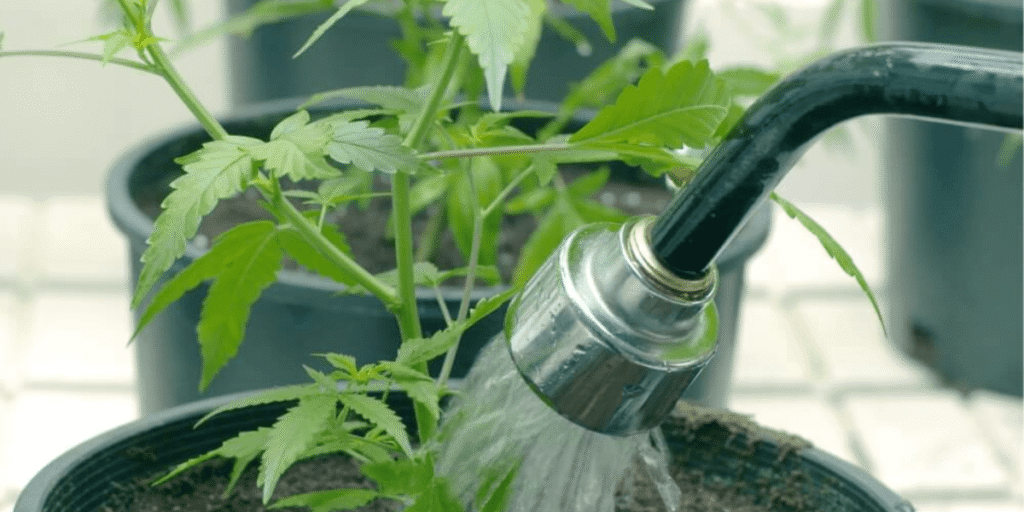
Step 5: What to Do After Trimming: Drying & Curing Basics
Proper drying and curing are vital to maximize flavor and potency.
- Drying: Hang trimmed buds upside down in a cool, dark, and well-ventilated space for 7–14 days. Maintain humidity around 50-60%.
- Curing: Place dried buds into airtight jars, opening them daily for 10–15 minutes during the first 1–2 weeks to release moisture and gases. This helps improve aroma, smoothness, and shelf life. If you want to know whether flushing is needed before harvest.
Step 6: Hand Trimming or Machine Trimming — Pros and Cons
| Criteria | Machine Trimming | Hand Trimming |
|---|---|---|
| Speed | Very fast, suitable for commercial use | Slow but detailed |
| Precision | Can damage delicate trichomes | Gentle, preserves quality |
| Cost | High upfront investment | Low cost, more labor |
| Quality | Slightly rougher trim | Superior aesthetics and potency |
| Recommended for | Large-scale growers | Small-scale and craft growers |
For home growers seeking the best quality, hand trimming remains the preferred method.
Step 7: Creative Uses for All That Leftover Trim
Sugar leaves and small popcorn buds leftover from trimming are valuable:
- Make concentrates like hash or rosin.
- Create edibles by infusing butter or oils.
- Produce tinctures or topicals for medicinal use.
- Compost any unusable material to enrich your soil for the next grow.
Maximize your harvest by turning trims into valuable products.
Essential Cannabis Trimming Tools
To achieve high-quality, well-manicured cannabis buds, having the right trimming tools is key. Here are some must-haves:
- Trimming Scissors: Go for fine-tip, stainless steel scissors with a comfortable grip for precision trimming.
- Isopropyl Alcohol or Cleaner: Helps keep your scissors clean from sticky resin buildup.
- Trim Tray or Mat: Catches loose leaves and trichomes for easy collection and reuse.
- Rubber Gloves: Keep your hands clean and prevent resin from sticking.
- Trimming Machine (for large-scale growers): Speeds up the process and reduces manual effort.
My Recommendations for Better Cannabis Trimming
After working with different growers and setups, here are a few personal recommendations to help you get the most out of your cannabis trimming process:
- Invest in quality tools: A pair of precision trimming scissors and a non-stick trimming tray can make your job smoother and more efficient.
- Choose hand trimming for small batches: If you’re growing at home or focusing on craft cannabis, hand trimming offers better control and preserves trichomes.
- Go with dry trimming in humid environments: This reduces the risk of mold and gives you more control during the curing process.
- Save your trim: Don’t toss it! Use it for making edibles, hash, or topicals,especially if you’re trimming sugar-rich leaves.
- Use proper lighting: Good visibility helps reduce mistakes. Consider using a focused grow light from the Greenfuturelight collection for accurate trimming.
These tips can elevate the look, aroma, and quality of your final buds,turning a good harvest into a great one.
FAQ: Your Top Questions About Bud Trimming
Q1: How often should I sharpen my scissors?
A: Clean and sharpen your scissors regularly, ideally after every large trimming session, to keep cuts clean and reduce hand fatigue.
Q2: Can I freeze my buds before trimming?
A: Freezing can make trimming harder and brittle; it’s usually better to trim fresh or dried buds.
Q3: What’s the best humidity for drying buds?
A: Aim for 50-60% relative humidity with good airflow and darkness.
Q4: How do I avoid mold during drying?
A: Maintain airflow, control humidity, and avoid overcrowding buds.
Q5: Can I reuse leftover trim for anything?
A: Yes! Leftover trim can be used to make concentrates, edibles, tinctures, or even composted to enrich your soil.
Wrap-Up: Key Takeaways for a Smooth Trimming Process
Trimming cannabis is an essential step that can greatly impact the final quality of your buds. With the right tools, proper timing, and careful technique—whether you choose wet or dry trimming,you’ll enhance flavor, potency, and appearance. Like any skill, practice makes perfect, and mastering trimming will help you consistently produce top-notch cannabis that’s both beautiful and enjoyable.
Want to level up your cannabis trimming skills and overall harvest quality? Visit our website: www.greenfuturelight.com
Explore our expertly designed LED Grow Lights and trimming tools,crafted to support every stage from grow to cure.
Have trimming questions or need help fine-tuning your setup? Contact our team for free, personalized support!
Here’s to cleaner cuts and better buds! 💚