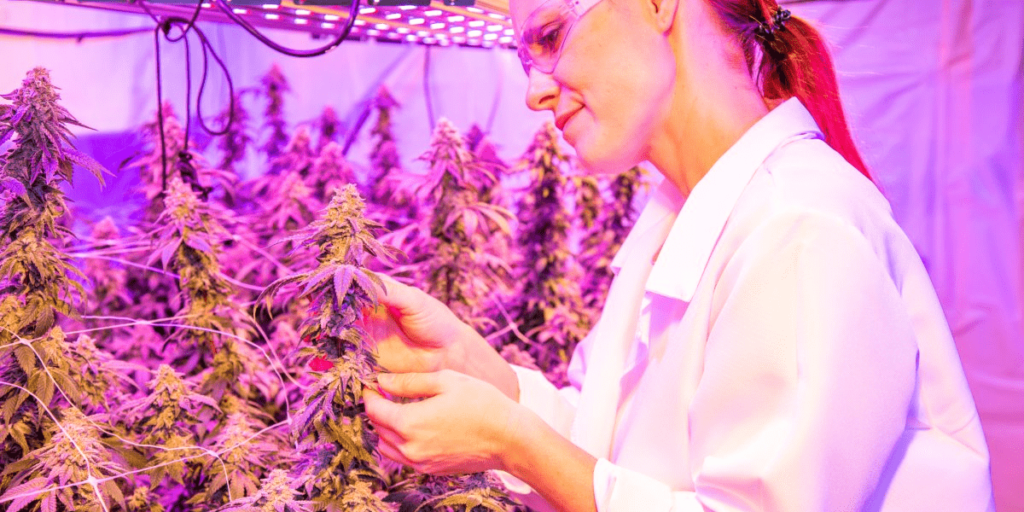
Test Soil pH for Cannabis is the first and most crucial step toward healthy, high-yield plants. Many beginner growers focus on lighting, nutrients, and genetics, but overlook the foundation of it all soil pH. When the pH is off, even the most carefully balanced nutrients can’t be absorbed, leading to stunted growth, yellow leaves, or poor flowering.
Soil pH isn’t just a number; it determines how well your cannabis plants can access essential nutrients. If you want robust, vibrant growth and dense, resin-rich buds, mastering soil pH must be part of your grower’s toolkit.
This guide will walk you through everything you need to know from understanding what pH really means, to how to test it accurately, and how to adjust it for optimal performance. Start here, and take full control of your cannabis plant’s health from the ground up.
Test Soil pH To Cannabis: Why It’s Crucial Is Growth
In chemistry, pH is a measure of a solution’s acidity or alkalinity, ranging from 0 to 14. A pH less than 7 is acidic, 7 is neutral, and greater than 7 is alkaline. For cannabis, maintaining a precise pH level in the soil or growing medium is paramount.
Understanding Optimal Soil pH Ranges for Healthy Cannabis
Cannabis plants have specific pH requirements that vary slightly depending on the growing medium:
- Soil Cultivation: The recommended pH range is 6.0 – 7.0. Typically, 6.3 – 6.8 is considered the sweet spot for optimal nutrient uptake.
- Hydroponics / Coco Coir: Because these mediums offer little to no buffering capacity, pH levels need to be more strictly controlled within 5.5 – 6.5, with 5.8 – 6.2 being the ideal range. Understanding the nuances of different cannabis growing mediums, whether in soil or soilless setups, is crucial for tailored care.
Preventing Nutrient Lockout: The Role of Soil pH Testing
Think of nutrients as hidden treasures in the soil and pH as the key. If the pH is too high or too low, nutrients become “locked out,” meaning your plant can’t absorb them. This is called nutrient lockout, and it’s one of the most common causes of poor plant health.
How Soil pH Influences Cannabis Nutrient Absorption
Macronutrients (N-P-K):
- Nitrogen (N): Best absorbed between pH 6.0–7.0. Vital for leafy growth.
- Phosphorus (P): Easily locked out below pH 6.0 or above 7.0. Key for roots and flowers.
- Potassium (K): Stable across a wide range, but still sensitive to extremes.
Secondary Nutrients (Ca, Mg, S):
- Calcium (Ca): Gets locked out in high pH. Needed for strong roots and cell walls.
- Magnesium (Mg): Locked out at high pH; essential for chlorophyll and photosynthesis.
- Sulfur (S): Generally available, but extremes still affect uptake.
Micronutrients (Fe, Mn, Zn, Cu, B, Mo):
- Iron, Manganese, Zinc, Boron, Copper: Prefer lower pH. High pH causes lockout and yellowing (chlorosis).
- Molybdenum (Mo): The exception it’s more available in higher pH.
Tip: Aim for a pH range of 6.0–6.5 in soil to keep most nutrients accessible and avoid deficiencies.
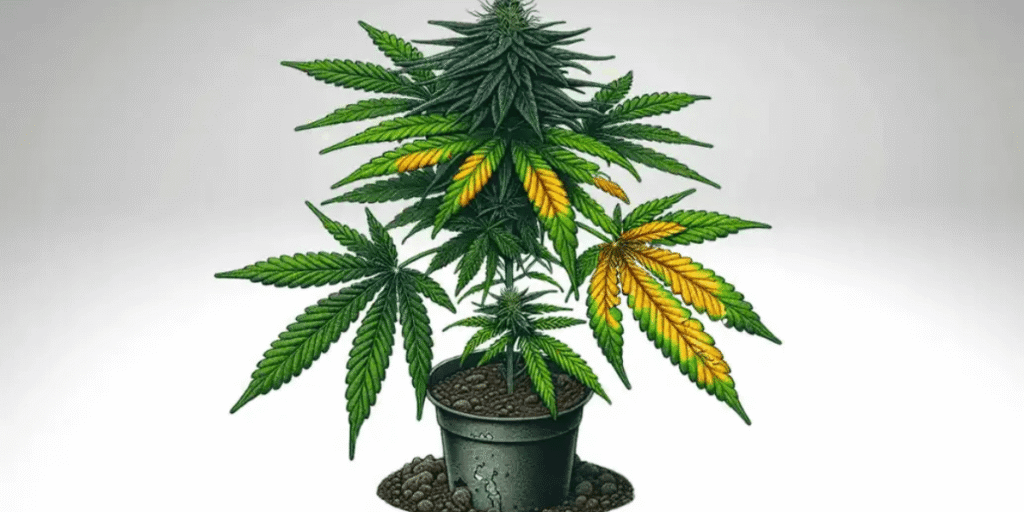
Identifying Cannabis pH Imbalance Through Plant Symptoms
When your soil pH deviates from the ideal range, your cannabis plant sends distress signals. Learning to interpret these warnings is key to successful cultivation.
Yellow Leaves on Cannabis? Test Soil pH for Chlorosis Diagnosis
Often indicates a nutrient deficiency due to pH imbalance.
- Nitrogen (N) Deficiency: Older leaves yellow evenly, starting from tips. Occurs if pH is too low or too high.
- Iron (Fe) Deficiency: New leaves show yellowing tissue with green veins. Caused by high pH.
- Magnesium (Mg) Deficiency: Older leaves yellow between green veins, sometimes with brown spots. Caused by high pH.
- Sulfur (S) Deficiency: Uniform yellowing on new leaves. Less common, linked to extreme pH.
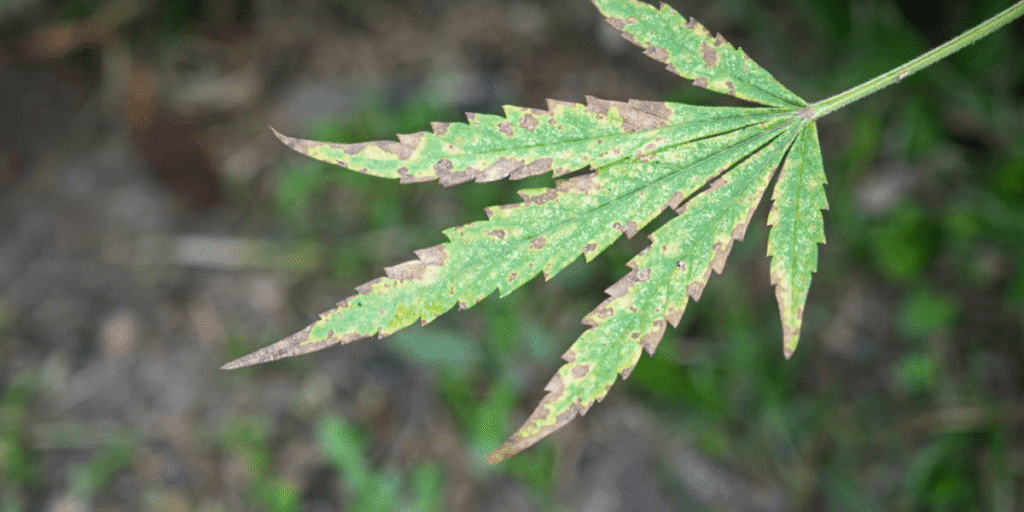
Brown Spots on Cannabis Leaves? Check Your Soil pH Levels
- Calcium (Ca) Deficiency: Burnt edges or necrosis on new leaves, distorted growth. pH too high or too low.
- Potassium (K) Deficiency: Burnt, yellowish-brown edges on older leaves. Inappropriate pH affects absorption.
- Nutrient Burn: Over-concentration of nutrients due to pH imbalance can also cause tip burn.
Stunted Cannabis Growth? Soil pH Might Be the Hidden Cause
The most general sign of pH imbalance. Incorrect pH prevents efficient nutrient absorption, leading to overall weak, small plants with poor photosynthesis and inhibited growth.
Red or Purple Cannabis Stems: Test Soil pH to Diagnose Deficiency
A classic indicator of Phosphorus (P) deficiency. Often seen in colder temperatures or with incorrect pH levels (too acidic or too alkaline). Lack of phosphorus leads to accumulation of anthocyanin pigments.
Curled or Brittle Leaves? How pH Testing Can Help Cannabis Health
Can be related to Boron (B) or Copper (Cu) deficiencies, as these micronutrients get locked out by pH imbalance. Leaves may show irregular growth or become fragile.
Important Tip: pH problems often combine with other environmental factors. Always start diagnosis by checking pH, as it’s the most measurable and foundational factor.
Step-by-Step Guide to Accurately Testing Cannabis Soil pH
Measuring soil pH is the crucial first step in resolving any issues. Choosing the right tools and following the correct procedures will ensure you get accurate readings.
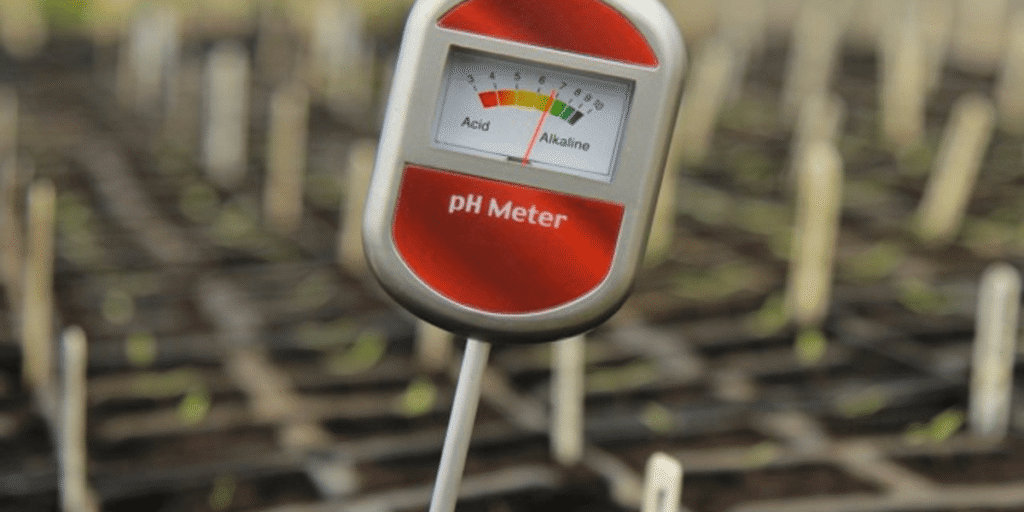
Best Cannabis Soil pH Testing Tools and Meters Reviewed
- Digital pH Meter Highly Recommended!
- Pros: High accuracy, intuitive readings, relatively easy to use. This is the preferred choice for precise pH management.
- Types:
- Pen-style pH meters: Economical, compact, suitable for beginners (e.g., Apera Instruments PH20).
- Probe-style pH meters: Often more professional, higher accuracy, more durable probes. Some models allow direct insertion into soil (though preparing a solution is generally recommended to extend probe life), such as the Bluelab Soil pH Pen.
- Maintenance: The electrode of a digital pH meter is its core component and requires careful maintenance.
- Regular Cleaning: Rinse the electrode thoroughly with distilled water or a specialized cleaning solution.
- Keep Moist: When not in use, the electrode should always be immersed in the storage solution provided with the pH meter. Never let it dry out, as this will severely impact its accuracy and lifespan.
- Regular Calibration: This is the most critical step to ensure accurate readings.
- pH Test Strips / Liquid Test Kits
- Pros: Very economical, widely available, simple to use.
- Limitations: Lower accuracy, typically only provide a rough pH range (e.g., between 6.0-6.5), not precise to one decimal place. Color interpretation can be subjective. Suitable for quick, rough checks or as a backup for a digital pH meter.
How to Calibrate Your pH Meter for Reliable Cannabis Testing
No matter how expensive your pH meter is, if it’s not regularly calibrated, its readings can be inaccurate. pH meter electrodes age over time and with use, and environmental temperature changes can also affect readings.
- Why Calibrate? To ensure your pH meter’s readings match the known pH values of standard solutions (calibration solutions), thus guaranteeing accuracy when testing your soil or water samples.
- Calibration Solutions: You will need to purchase specific pH calibration solutions. Common ones include pH 4.01 (acidic), pH 6.86 or 7.00 (neutral), and pH 9.18 or 10.01 (alkaline).
- One-Point vs. Multi-Point Calibration:
- One-Point Calibration: Uses only one calibration solution (usually pH 7.00) for calibration. Simple, but less accurate.
- Multi-Point Calibration (Two-point or Three-point): Typically uses two or three calibration solutions (e.g., pH 4.01 and 7.00; or 4.01, 7.00, and 10.01) for calibration. This is the more recommended method, covering a wider pH range and offering higher accuracy.
- Calibration Steps (Example for Two-Point Calibration):
- Preparation: Prepare clean containers, pour a small amount of pH 7.00 and pH 4.01 (or 10.01) calibration solutions into separate containers.
- Rinse Electrode: Thoroughly rinse the pH meter electrode with distilled water.
- First Point Calibration: Insert the electrode into the pH 7.00 calibration solution, stir gently, wait for the reading to stabilize, and press the calibration button (specific operation varies; refer to your pH meter’s manual).
- Rinse Again: Rinse the electrode with distilled water.
- Second Point Calibration: Insert the electrode into the pH 4.01 (or 10.01) calibration solution, stir gently, wait for the reading to stabilize, and press the calibration button.
- Finish: Rinse the electrode and return it to its storage solution.
- Calibration Frequency:
- Before first use with a new meter.
- Before each use (especially during critical growth stages).
- At least once a week or month.
- Whenever readings seem erratic or inaccurate.
Simple and Effective Cannabis Soil pH Testing Procedure
Accurate pH testing is straightforward with these steps:
- Preparation: Gather clean containers, distilled water, and your calibrated pH meter or test strips.
- Collect Soil Sample: Take small amounts of soil from various depths (e.g., 2-10 cm) and locations around your plant, avoiding direct root disturbance. Mix samples thoroughly, removing large debris.
- Prepare Soil Solution (1:1 Ratio):
- Combine 1 part mixed soil with 1 part distilled water in a clean container.
- Stir well to moisten all soil particles.
- Let it Settle: Allow the mixture to sit for 20-30 minutes. This ensures full reaction and particle settling for an accurate reading.
- Conduct the Test:
- Digital pH Meter: Gently insert the calibrated probe into the clear liquid layer (avoiding settled soil). Stir lightly, wait for stability, and record the reading.
- pH Test Strips: Dip a strip into the liquid, remove, and compare immediately to the color chart.
- Record Results: Document the date, pH value, and any plant observations. This helps track trends and evaluate adjustments.
Impact of Water Quality on Cannabis Soil pH Stability
The water you use significantly impacts your soil’s pH and overall system stability. Different water sources have varying pH and mineral content (TDS/EC).
- Tap Water:
- pH: Often alkaline (7.0-8.5+).
- Minerals/TDS: Contains chlorine and dissolved minerals (Ca, Mg), offering buffering capacity but making pH adjustment harder.
- Tip: Let it sit 24-48 hours to off-gas chlorine.
- Well Water:
- pH/Hardness: Highly variable based on location; can be very hard with high mineral/heavy metal content.
- Tip: Always get professionally tested before use.
- Rainwater:
- pH: Usually slightly acidic (5.0-6.0).
- Minerals/TDS: Very low.
- Pros: Excellent for plant growth due to purity.
- Cons: Can have pollutants; difficult to collect in large quantities.
- Reverse Osmosis (RO) / Distilled Water:
- pH: Near neutral (7.0), but zero minerals (TDS).
- Pros: Purest source, full control over nutrient solution.
- Cons: Lacks buffering capacity, so pH fluctuates wildly with minor additions. Requires frequent pH monitoring and adjustment, plus full micronutrient supplementation.
Key Takeaway: Understand your water source’s characteristics and pre-treat as needed (dechlorinate, filter, RO) for pH stability. High TDS/EC water is harder to adjust.
Precise Methods to Adjust Cannabis Soil pH Safely
Once you’ve determined that your soil pH is off-range, it’s time for adjustment. Remember, adjusting pH is a process of small, gradual changes, with patience and monitoring, avoiding drastic alterations that could shock your plants.
Key Principles for Gradual Cannabis Soil pH Correction
- Little by Little: Add small amounts of adjusting agent, then wait 24-48 hours, retest the pH, and continue adjusting as needed.
- Patience is Key: Soil pH changes take time, especially with solid amending agents like lime or sulfur powder.
- Continuous Monitoring: Regularly test pH during and after adjustment to ensure it stabilizes within your target range.
How to Lower High Soil pH in Cannabis Cultivation
When soil pH is too high (excessively alkaline), cannabis cannot absorb vital elements like iron, manganese, and phosphorus. You need to increase the soil’s acidity.
- Elemental Sulfur:
- Characteristics: Slow but long-lasting effect. Sulfur powder is broken down by microorganisms in the soil, producing sulfuric acid, which lowers pH.
- Dosage & Application: For potted soil, per gallon of soil, you might need approximately 1/2 to 1 teaspoon of sulfur powder. Mix it evenly into the topsoil, then water thoroughly.
- Time to Take Effect: Typically takes several weeks to months to show noticeable results, as it relies on microbial activity. Suitable for long-term adjustment and prevention.
- Sphagnum Peat Moss:
- Characteristics: Naturally acidic medium (pH ~3.0-4.0), able to effectively lower pH and improve soil structure.
- Dosage: Can be mixed into your potting soil, typically accounting for 10%-30% of the total volume.
- Note: Peat moss itself doesn’t contain many nutrients and can be difficult to re-wet once dry, so consider this in your mix.
- Compost:
- Characteristics: High-quality, well-rotted compost is usually slightly acidic (pH 6.0-7.0) and rich in humic acids, which help buffer pH and improve soil fertility.
- Dosage: Can be used as a top dressing or mixed into the soil during your next repotting.
- Other Acidic Adjusters:
- Citric Acid: Fast-acting but not long-lasting, easily broken down by microorganisms. Suitable for emergency situations or small adjustments, but not recommended as a long-term solution.
- Vinegar: Also fast-acting but not long-lasting, and improper concentration control can potentially kill beneficial soil microbes. Not recommended for long-term use.
- Phosphoric Acid / Nitric Acid: These are professional liquid pH Down solutions, commonly used in hydroponics or large-scale grows. Use with extreme caution, as they are highly concentrated and must be diluted and applied strictly according to instructions to avoid harm to plants and yourself.
Techniques for Raising Low Soil pH to Boost Cannabis Health
When soil pH is too low (acidic), nutrient absorption (like calcium, magnesium, molybdenum) suffers, and micronutrient toxicity can occur. Increase alkalinity with these methods:
- Garden Lime (Calcitic Lime):
- Info: Calcium carbonate, slowly raises pH, provides calcium.
- Use: 1-2 tbsp per gallon of soil; mix into topsoil, water in.
- Effect: Slow, takes weeks.
- Dolomite Lime:
- Info: Calcium and magnesium carbonate, raises pH, provides both Ca & Mg. Favored by growers for dual benefits.
- Use: Similar to garden lime (1-2 tbsp/gallon); mix into topsoil, water in.
- Effect: Slow.
- Wood Ash:
- Info: Highly alkaline, rich in potassium.
- Use: Extreme caution, very small amounts. Sprinkle on surface, water.
- Warning: Can cause rapid pH spikes and salt buildup. Not for beginners.
- Other Adjusters:
- Potassium Hydroxide: Primary component in professional liquid pH Up solutions for hydroponics. Use strictly diluted.
Post-Adjustment: After any pH adjustment, wait 24-48 hours then retest. Continue monitoring for stability.
Prevention is Key: Start with quality, balanced potting mix and properly treated water. Regular pH monitoring prevents major fluctuations.
FAQs: Common Questions About Testing Soil pH for Cannabis
Q1: My cannabis leaves are yellowing; is it definitely a pH problem? How can I tell?
A: Not necessarily! While pH imbalance is a common cause, yellowing leaves can also signal nutrient deficiencies/excess, improper watering, or environmental stress. How to tell:
- Observe pattern: Note where yellowing occurs (old vs. new leaves), and if veins remain green.
- Check moisture: Assess soil wetness (over/under-watering).
- Test pH: This is crucial. If pH is off, it’s likely the cause.
- Check EC/TDS: Confirm nutrient concentration if using solutions.
- Environmental check: Rule out light, temperature, or humidity issues. Tip: Start by checking pH and watering – they’re often the quickest culprits to diagnose.
Q2: I just watered; can I test the pH immediately? Why are my pH meter readings unstable?
A: No, wait 20-30 minutes after watering. This allows the soil solution to stabilize for accurate readings. Reasons for unstable readings:
- Uncalibrated meter: Always calibrate regularly (most common issue).
- Dirty/dry electrode: Keep it clean and in storage solution.
- Improper immersion: Ensure the probe is fully submerged without air bubbles.
- Suspended particles: Allow soil solution to settle before testing.
- Temperature changes: Drastic shifts can affect readings despite ATC.
- Low battery: Affects precision.
- Meter quality/lifespan: Electrodes are consumables (1-2 years lifespan).
Q3: I grow with RO (Reverse Osmosis) water, and my pH is always very low. Do I need to add anything?
A: Yes, RO water has almost no buffering capacity, making its pH highly unstable and prone to dropping. Solutions:
- Use pH Up products: Safest, direct way to raise pH. Add gradually and re-measure.
- Mix with tap water: If tap water is suitable, mixing can add buffering minerals.
- Nutrient impact: Note that adding nutrients will also influence the pH of RO water. Key: When using RO water, frequent and meticulous pH monitoring and adjustment are essential with every nutrient solution batch.
Q4: Can I just use lemon juice or vinegar to adjust pH? Why is it not recommended for long-term use?
A: Only for emergencies or temporary fixes; not for long-term use. Reasons not recommended:
- Not long-lasting: Organic acids break down quickly, causing pH to rebound.
- Harms microbes: High concentrations can kill beneficial soil microbes.
- Nutrient imbalance: Provides no other essential nutrients, risking deficiencies.
- Salt buildup: Can lead to accumulation over time. Recommendation: Use specialized horticultural pH Up/Down products, or natural alternatives like elemental sulfur, garden lime, or dolomite lime for stable, long-term adjustments.
Q5: My cannabis plant is already flowering; do I need to change the pH range?
A: Yes, generally, slightly adjust pH to the lower end of the recommended range during the flowering phase (Bloom Phase).
- Vegetative pH: Typically 6.3 – 6.8 (soil).
- Flowering pH: Aim for 6.0 – 6.5 (soil). Reason: Lower pH in flowering enhances phosphorus (P) absorption, which is crucial for bud development and overall yield, as well as vital micronutrients like iron. Actionable Advice: Gradually lower pH as flowering begins, and continuously monitor. Pair with flowering-specific nutrients.
Summary: Why Regular Cannabis Soil pH Testing Matters
Mastering cannabis soil pH management is an indispensable part of your successful cultivation journey. By understanding the critical role of pH in nutrient absorption, learning to interpret your plant’s distress signals, employing correct testing methods, and patiently and meticulously making adjustments, you will be able to create an optimal growing environment for your cannabis plants.
Remember, growing cannabis is a continuous process of learning and practice. Stay curious, pay close attention to your plants, and consistently monitor and adjust pH levels. Your diligent efforts will ultimately yield healthy, robust cannabis with bountiful harvests. Happy growing!
Ready to Test Cannabis Soil pH? Start Growing Smarter Today
Testing your soil pH might seem tricky at first, but once you get the hang of it, it’s actually quite easy and it’s one of the best ways to help your cannabis plants thrive.
When was the last time you checked your soil’s pH? We’d love to hear your stories and tips drop a comment below!
Looking for more grow advice? Follow us on Instagram @Greenfuturelight for daily inspiration.
If you’re new to indoor growing, check out our beginner-friendly LED grow lights at www.greenfuturelight.
Want to take your grow to the next level? Explore our premium LED Grow Light Collection today!
Have questions? Contact Our Team are ready to help,contact us for a free consultation anytime.
Here’s to healthy plants and abundant harvests,happy growing!